Image Marker
This page is used to view, edit, and manage all images stored in the system.
Images are usually created automatically from other modules and linked to this section through the Image Marker module. The most common use case is capturing item images in Orders > Drop and displaying them across other order-related pages. Additionally, Accounting modules such as Invoice and Bill can attach images that are also stored and managed here.
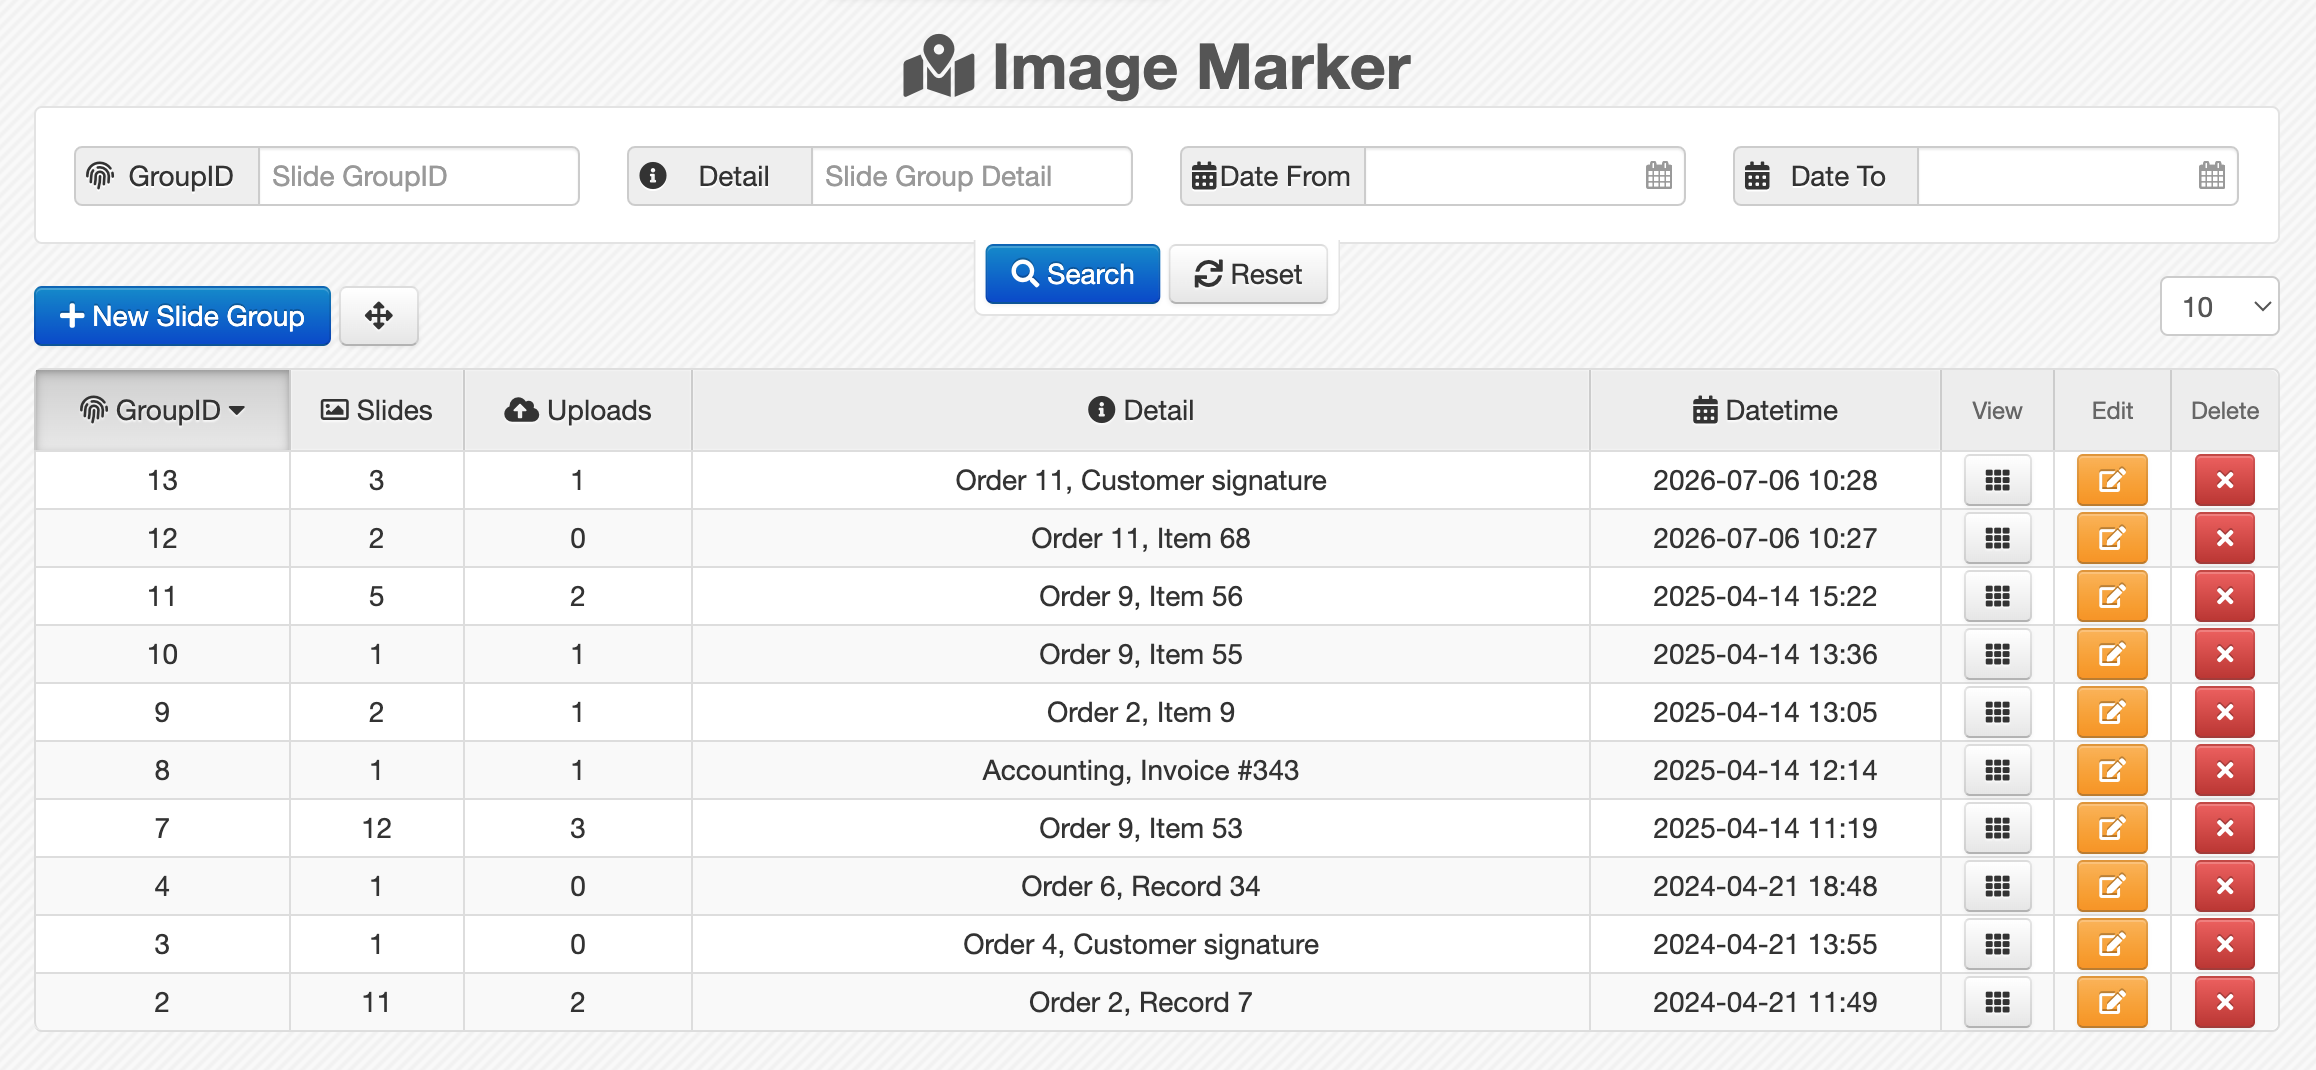
Page Layout
Like other report pages in Caramel, the Image Marker is mainly divided into two sections:
- A filter box for searching slide groups
- A results table for reviewing and managing them
Filters
The filter section is simple and includes these filters:
- GroupID: The slide group identifier
- Detail: Description sent by the source module
- Date From: Start date of registration
- Date To: End date of registration
At the bottom of the filter box:
- Search applies the selected filters
- Reset clears all current filters
Use date filters to quickly locate images related to a specific operational period.
Results Table (Slide Groups)
The results are displayed in a table of slide groups.
- Each column represents a defined field of the slide group
- Clicking on column headers allows sorting (ascending/descending)
Each row includes:
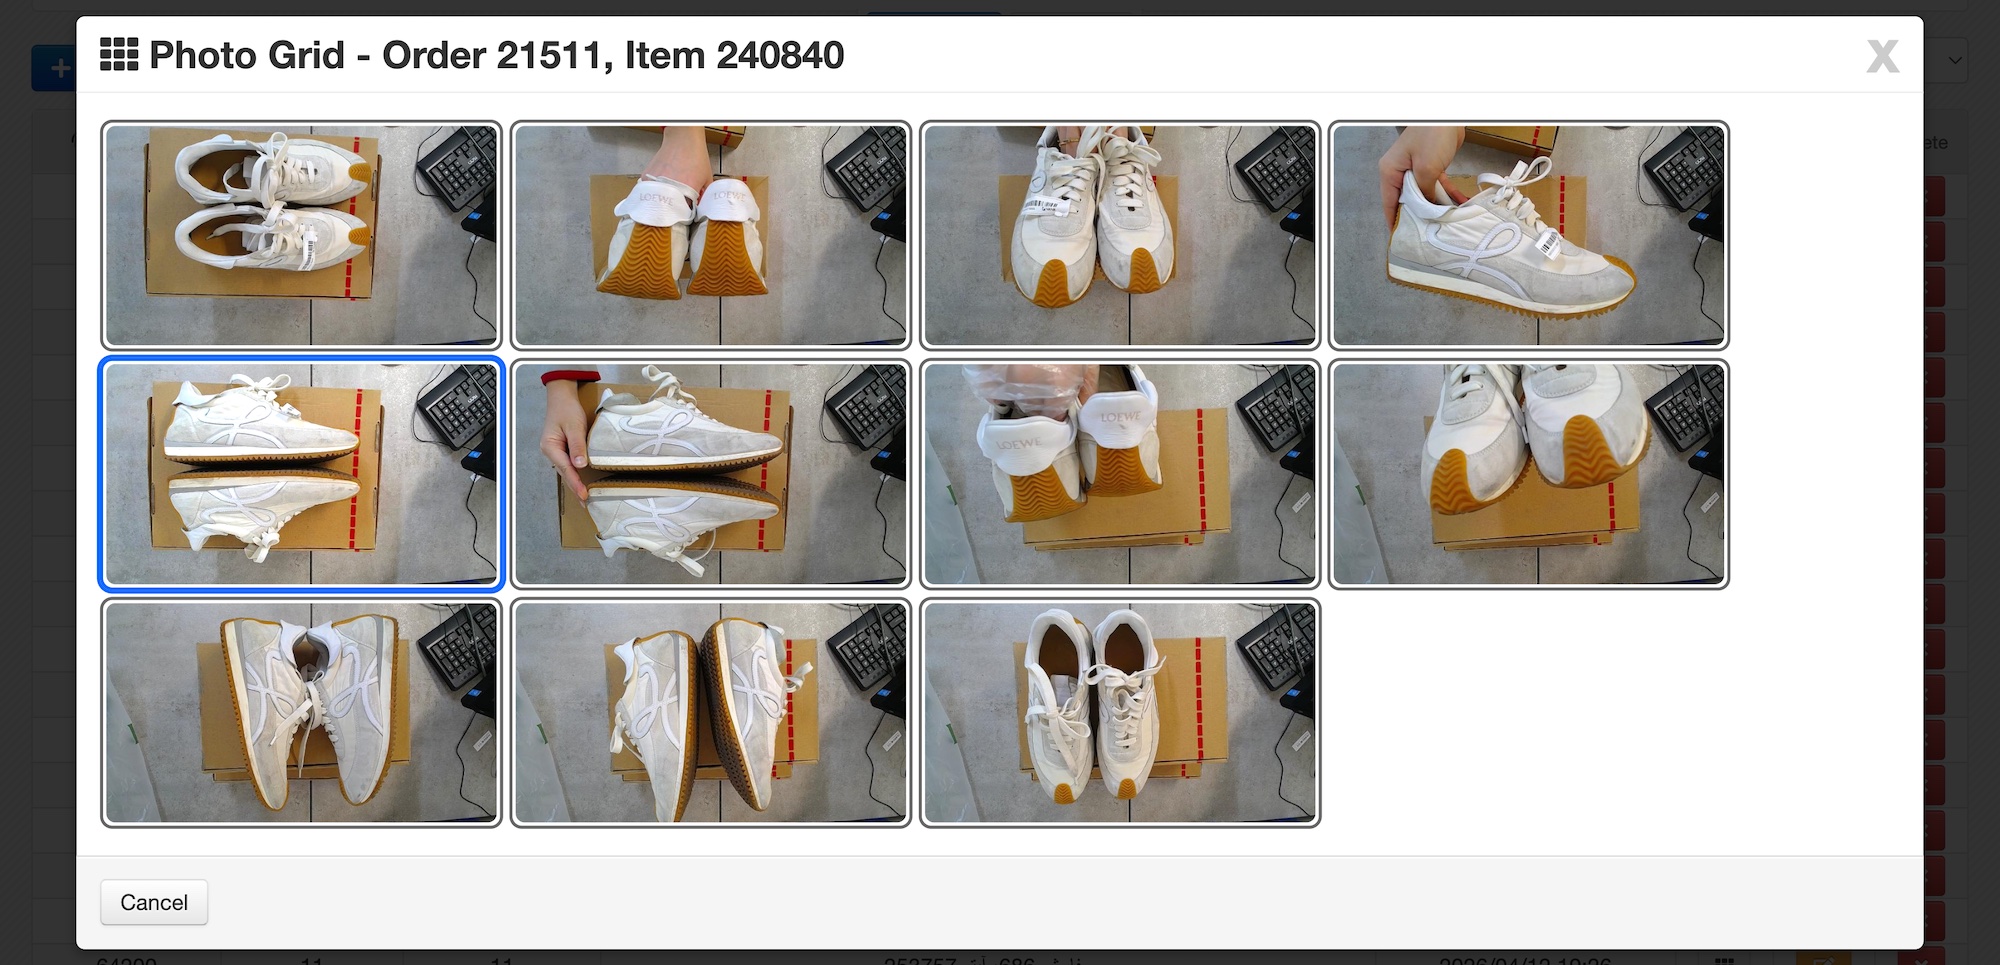
- View Photo Grid
- Edit slide group
- Delete slide group
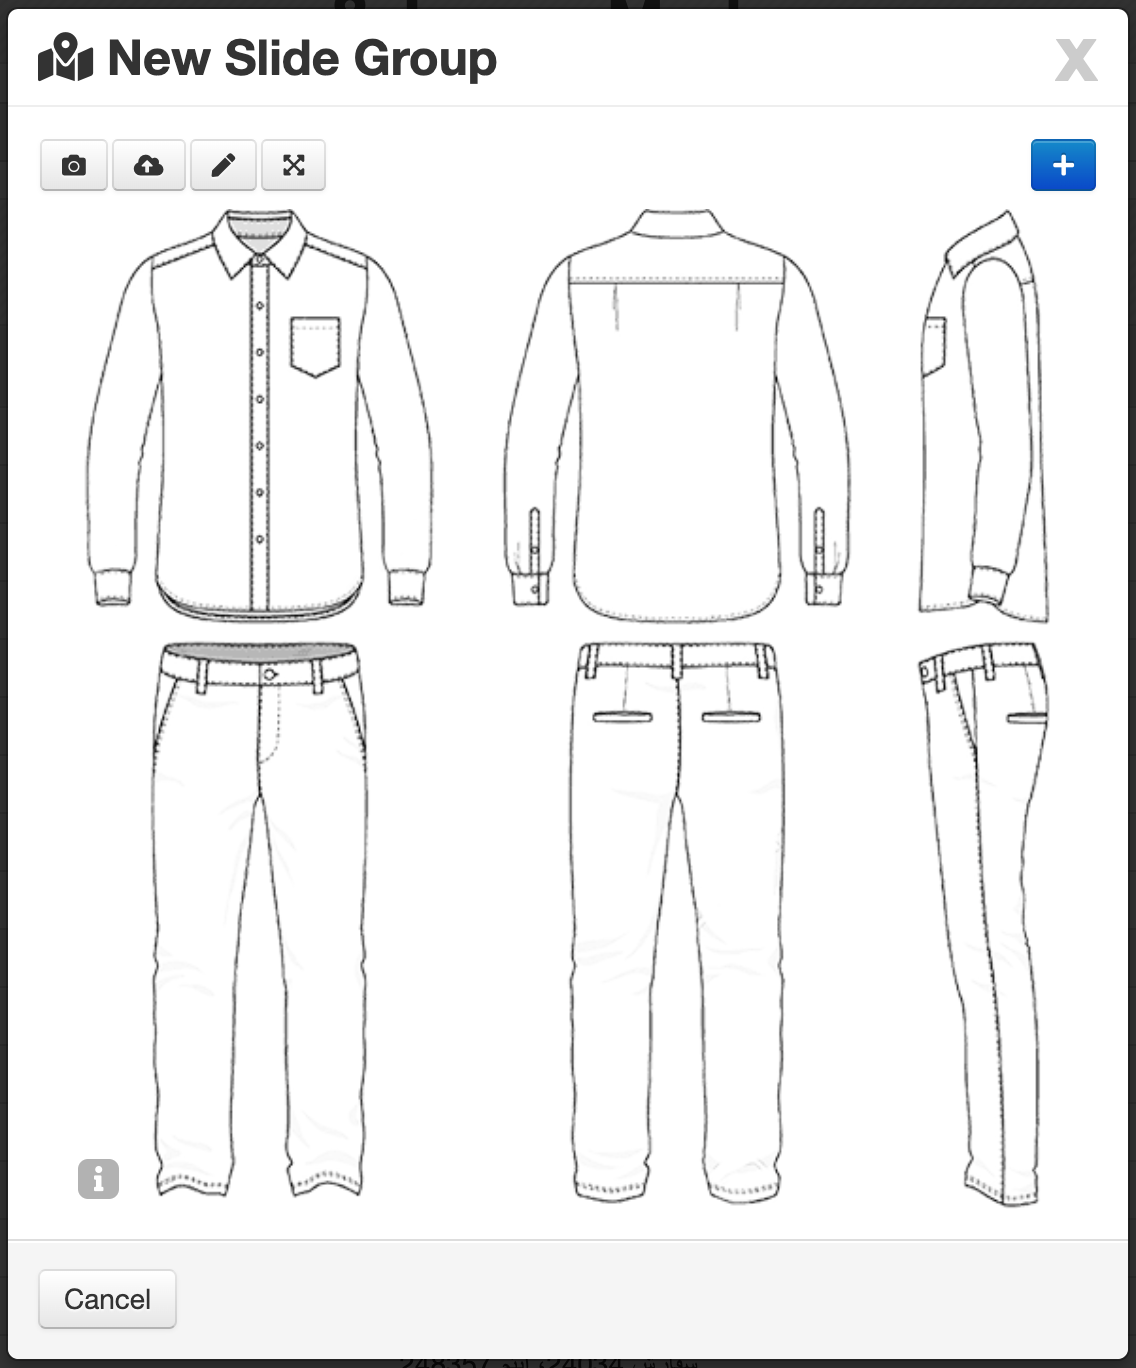
Creating a New Slide Group
Use: New Slide Group
A slide-based window will open.
Each item can contain multiple slides, and depending on the article, a default pattern image may be displayed (for example, a shoe outline).
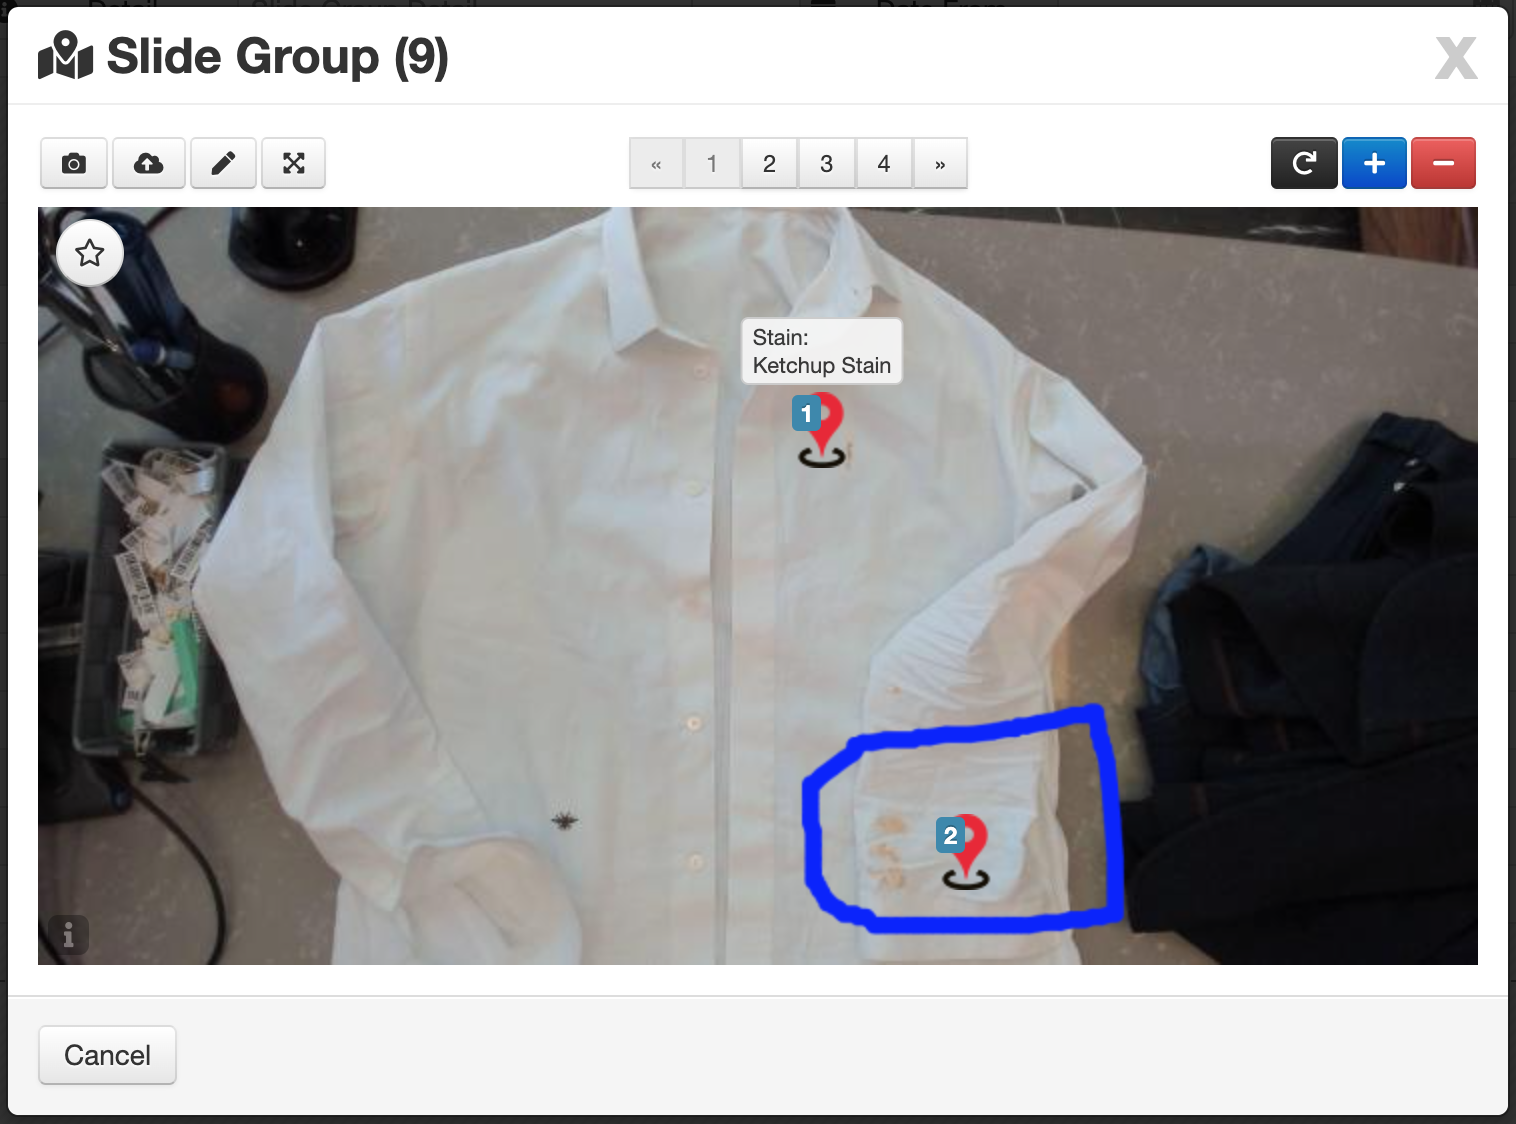
Slide Tools
Top Toolbar
From left to right:
- Capture photo (creates a new slide)
- Upload image from device
- Enable drawing mode
- Zoom
Navigation:
- Use pagination to switch between slides
- Keyboard arrows (← / →) can be used for faster navigation
Slide actions:
- Reset slide
- - Remove slide
- + Add new slide (creates a blank slide with default pattern)
Each captured photo is automatically saved as a new slide.
Keyboard Shortcuts
To work faster in the slide window, you can use these shortcuts:
- C: Open Camera
- Space: Take Photo
- Enter: Submit & Send
- ← / →: Navigate between previous and next slides
Using keyboard shortcuts can significantly speed up image capturing during high-volume operations.
Marking with Pins
You can quickly mark areas on an image using pins:
- Click anywhere on the image to place a marker
- Pins appear as with a number
- Pins can be dragged and repositioned
These markers are later used by operational staff during processing, workflow steps, or accounting checks (e.g., quality control).
Drawing Mode
Activate drawing mode using:
Available tools:
- Select pen size, style, and color
- Draw using mouse or touch
- Eraser tool
- Clear all drawings
Actions: Cancel Save
Resize Images
Use: to resize images in bulk.
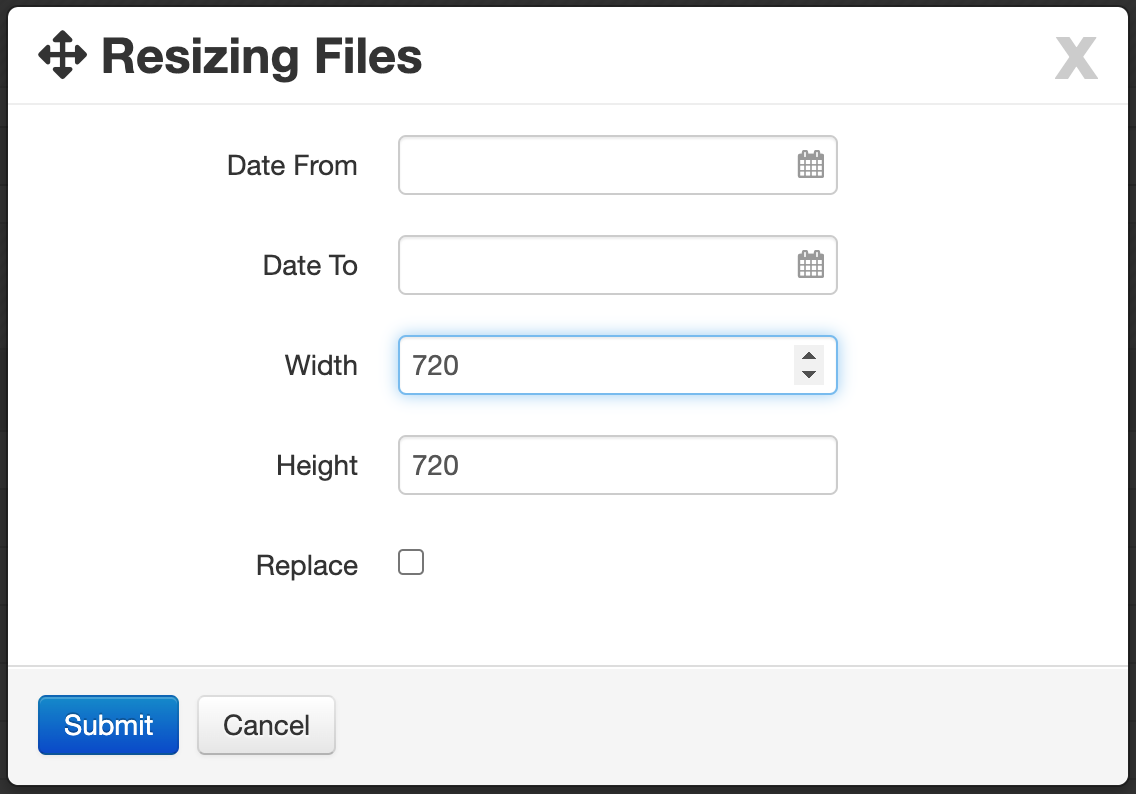
A form will appear with the following fields:
- Date From: Start date of images
- Date To: End date of images
- Width: Maximum width (e.g., 720)
- Height: Maximum height (e.g., 720)
- Replace: Whether to overwrite original files
After clicking submit, the system will process the resizing operation.
This process may take several minutes depending on the selected date range.
It is recommended to coordinate with the support team before performing large-scale resizing operations.