Articles
This page helps you manage Article Categories and Articles in Caramel.
As explained in the Terminology page, an Article represents the type or nature of an Item. Articles are combined with Item options, and together with Operations they are also used as a base for pricing.
Use this page to create, edit, organize, and sort both Article Categories and Articles.
In Caramel, Article Group and Article Category mean the same thing. The software may use these two terms interchangeably.
Page Layout
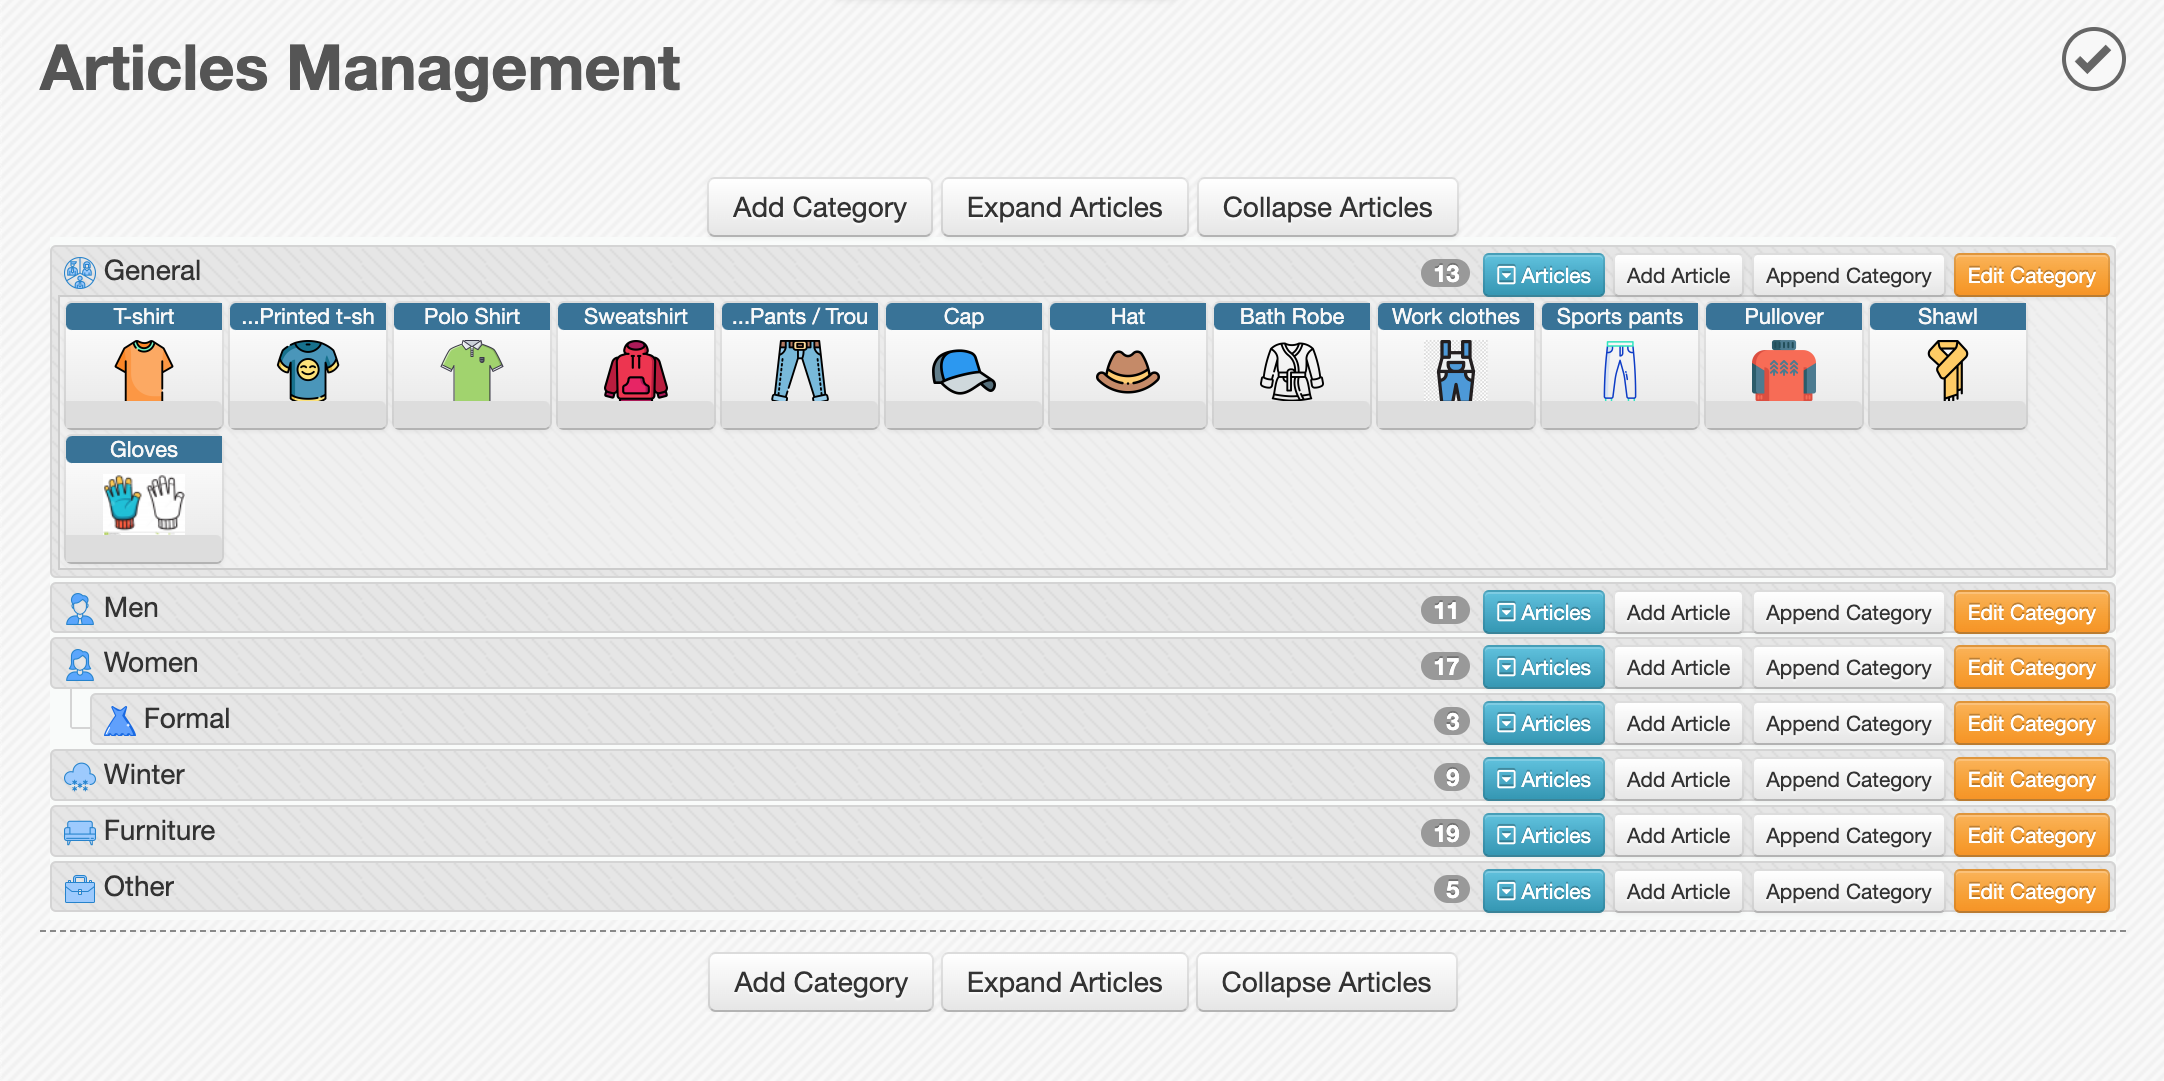
When you open Management > Articles, you will see a tree-style list of rows connected in a hierarchy.
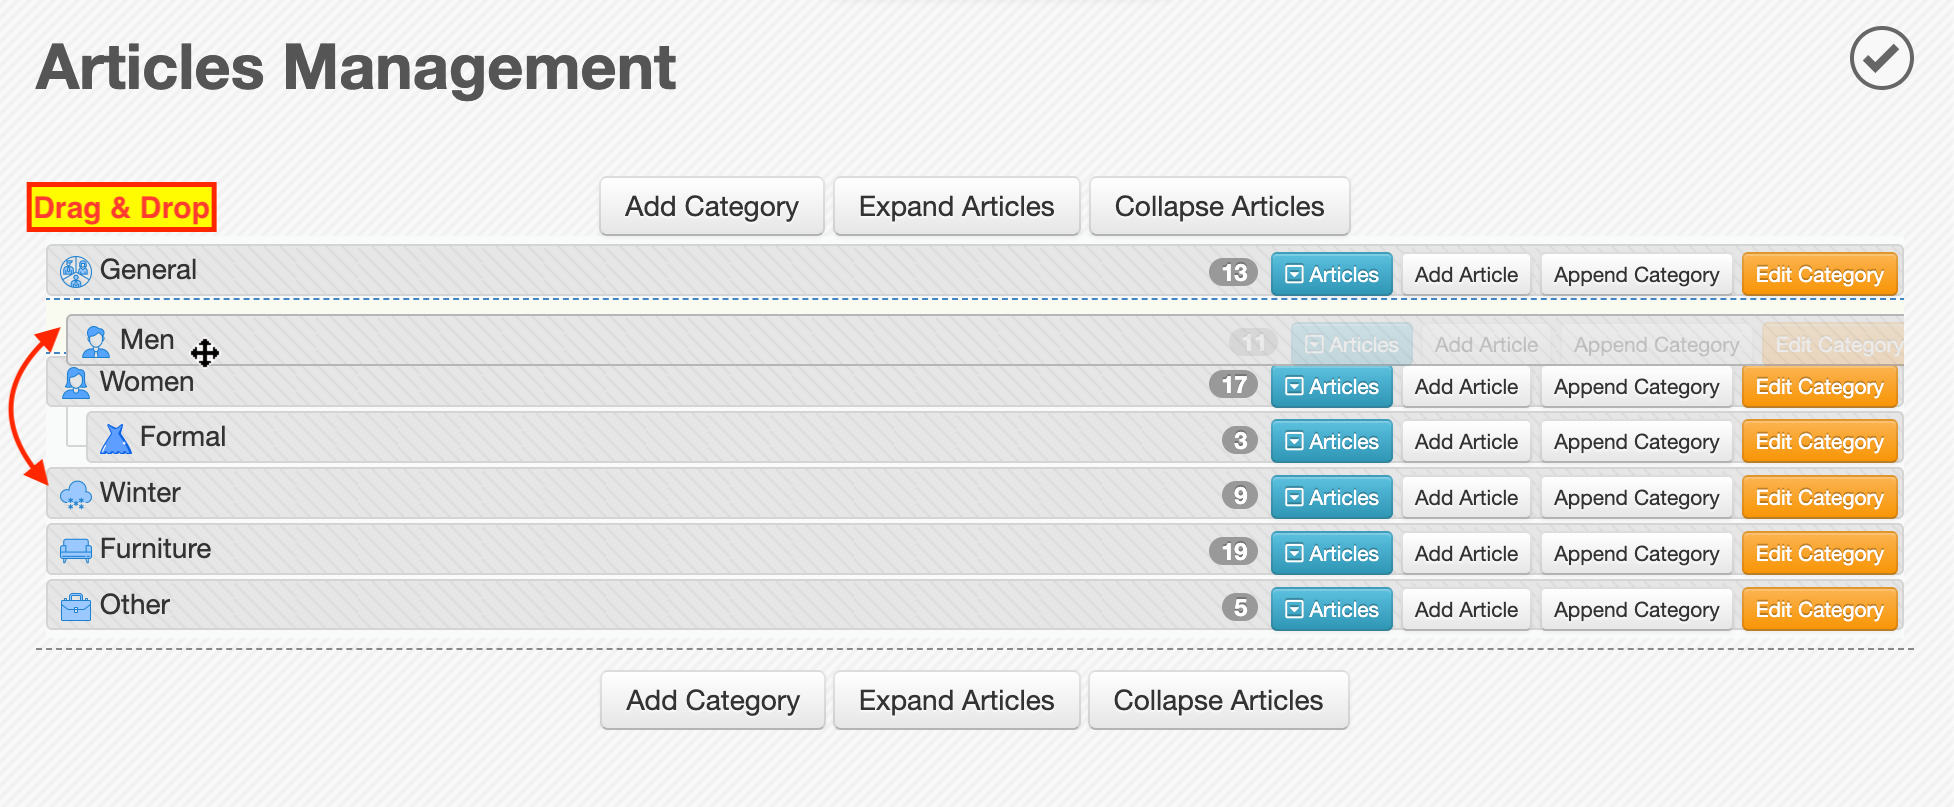
Each row represents an Article Category. Categories can be reordered with drag & drop, and one category can be moved under another as a child category.
On the left side of each row, you can see the category name and icon. On the right side, there are several action buttons.
Category Row Actions
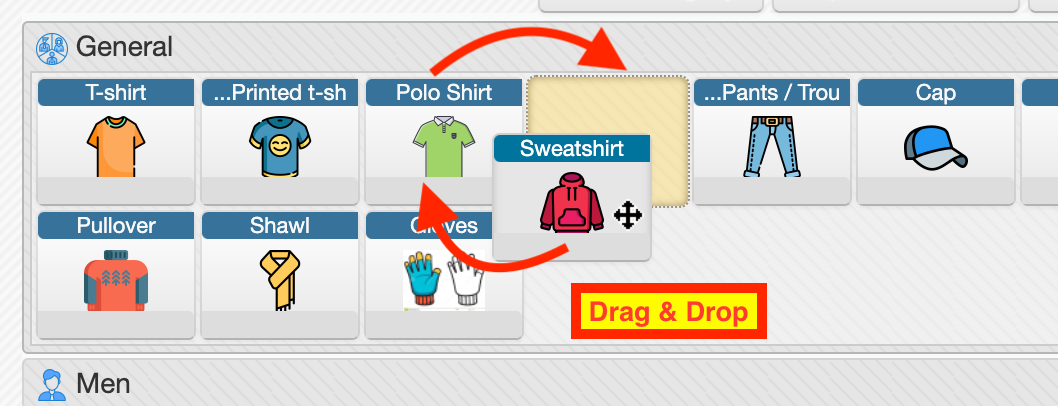
- Articles Expands the selected category and shows its Articles as square cards. These cards can also be moved with drag & drop to reorder them or move them to another category. Click any Article card to open the Edit Article form. Click Articles again to collapse the row.
- Add Article Opens the Add Article form with the current category already selected.
- Append Category Opens the Add Category form and sets the current category as the parent.
- Edit Category Opens the selected category for editing.
Header and Footer Actions
At both the top and bottom of the category tree, you will see these buttons:
- Add Category
- Expand Articles
- Collapse Articles
Use Expand Articles to open all categories and show the Articles inside them. Use Collapse Articles to close them all at once.
Available Forms
This page includes two main forms:
- Add/Edit Category
- Add/Edit Article
Category Form
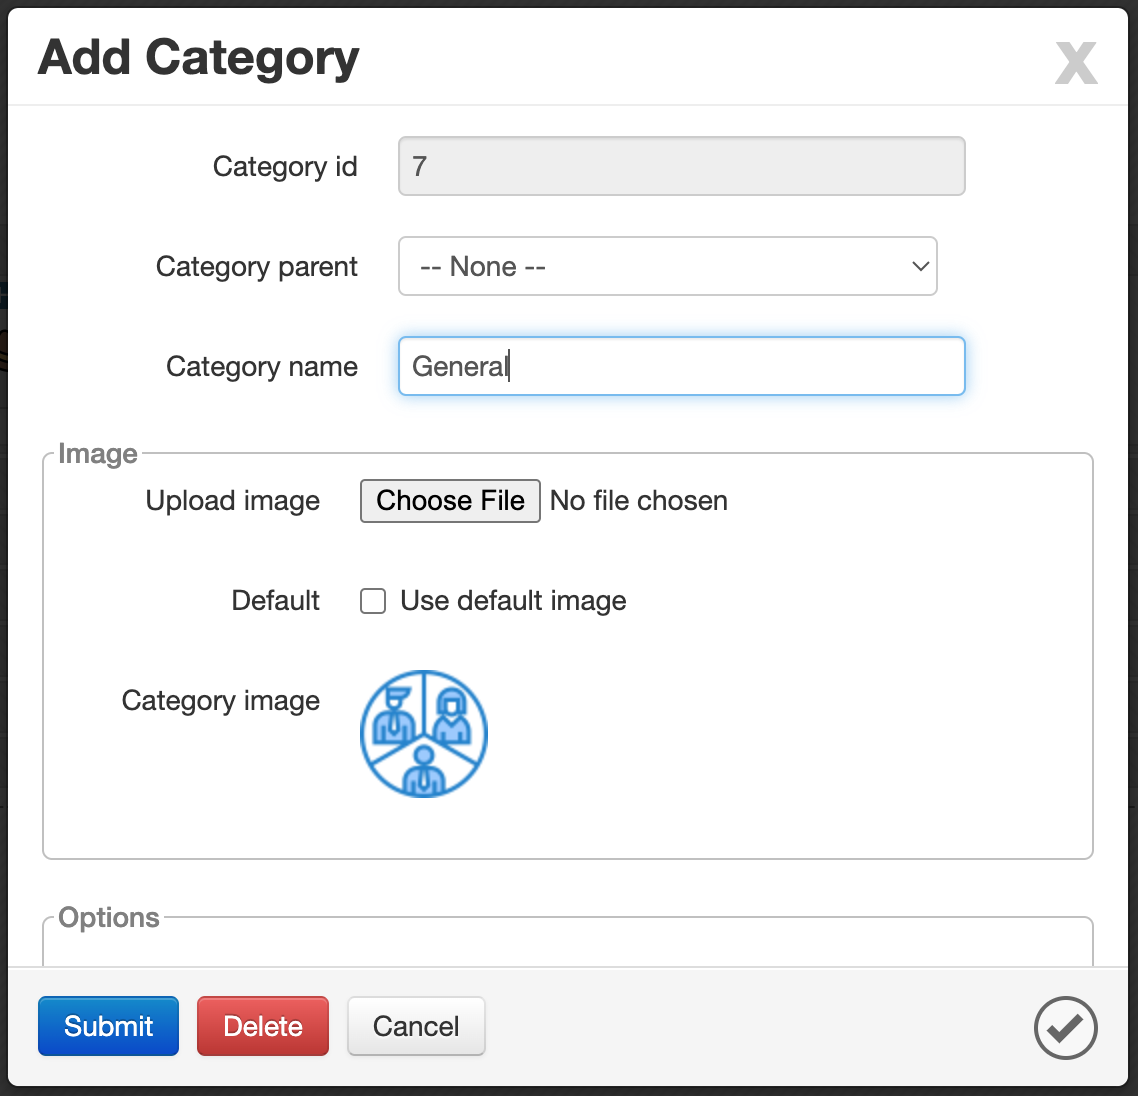
Use this form to create or edit an Article Category.
Category Fields
- Category ID: Assigned automatically by the system. This field is read-only and shown for reference only.
- Category Parent: Select the parent category. If this field is left empty, the category will be created as a top-level category. You can still change its position later with drag & drop.
- Category Name: The name of the category.
- Image: Upload an image for the category. For a cleaner interface, it is better to use icons with a consistent color theme and a flat style.
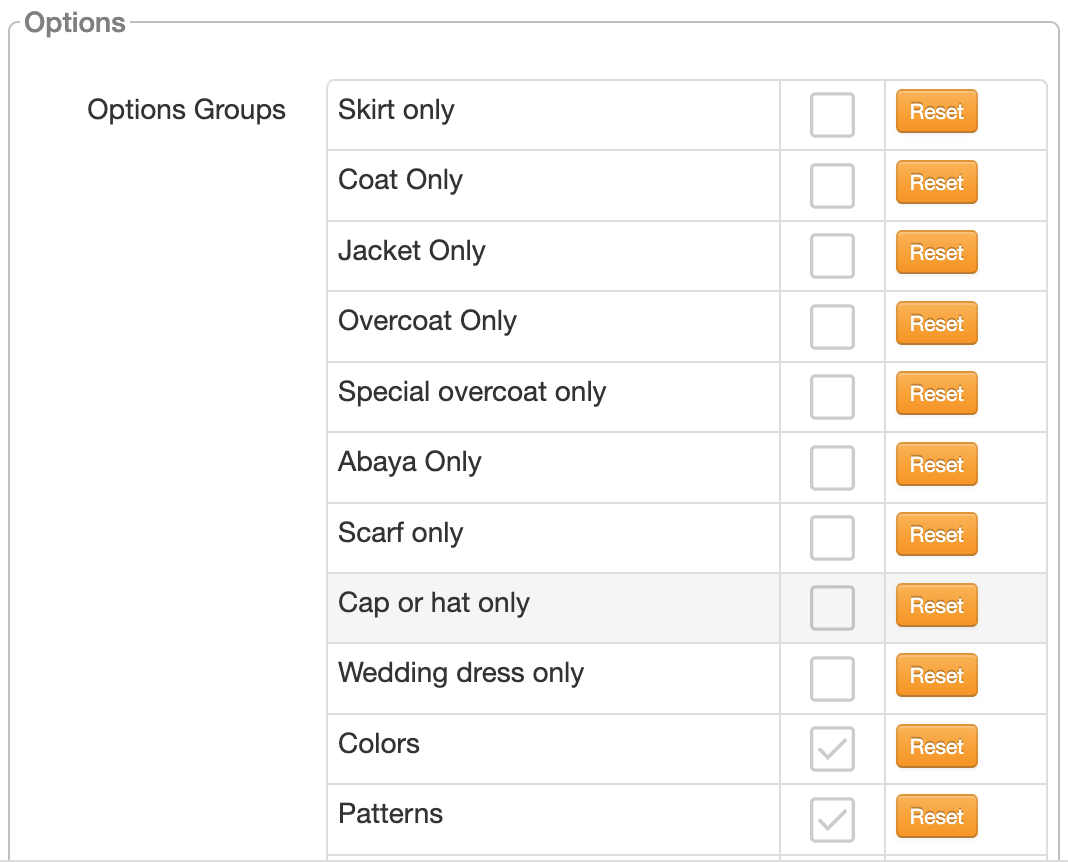
- Options: A checklist of Option Groups connected to this category.
How Category Options Work
The Options box defines which Option Groups should appear when an Article from this category is selected during order creation on the Drop page.
In the Options module, some Option Groups are defined as public for all Articles, while others are hidden or non-public.
In this checklist:
- Checked Option Groups are linked to this category and will appear when an Article from this category is selected.
- Public Option Groups may appear with a lighter checked state, meaning they are already available by default for this category.
For example, you may create a non-public Option Group such as Wedding dress only, then enable it here only for the related category.
A similar Options checklist is also available in the Article form, so you can define Option Groups for individual Articles as well.
Article Form
Use this form to create or edit an Article.
Main Fields
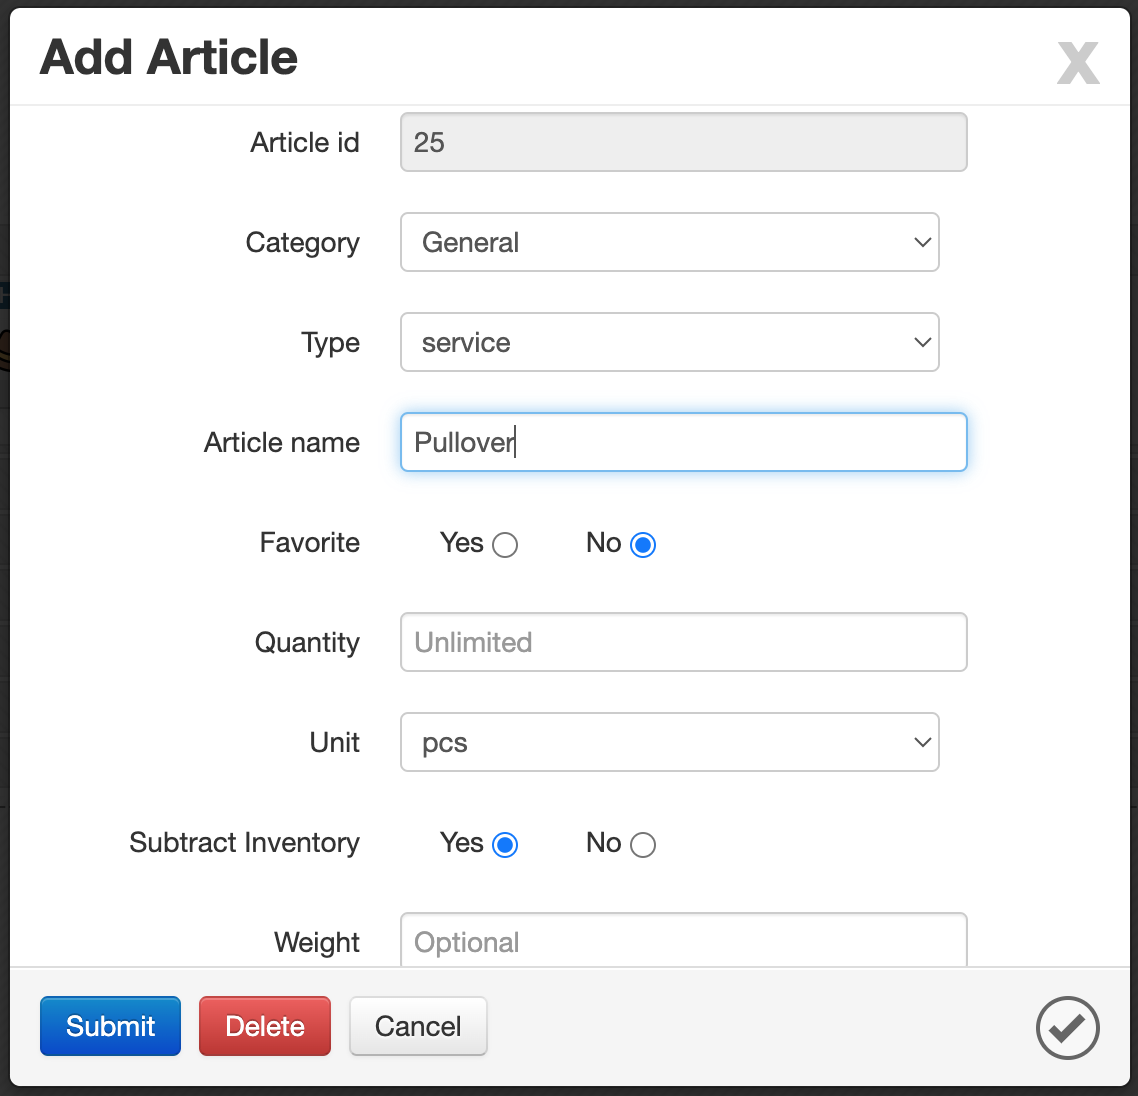
- Article ID: Assigned automatically by the system. This field is read-only and shown for reference only.
- Category: Select the parent category. You can also move the Article to another category later with drag & drop.
- Type: Choose one of these values:
Service,Product, orOther. - Article Name: The name of the Article.
- Favorite: Determines whether this article is shown in the “Favorite category” on the Drop page or not.
- Quantity: The default value is usually unlimited.
- Unit: Select from Units that are defined as Unit Indicators in the Units module, such as
pcs,slice,sheet,kg,m, orm2.
Optional Article Fields
The following fields are optional and can be used only when needed:
- Subtract Inventory: Determines whether this Article should reduce inventory stock.
- Weight: The weight value for the Article.
- Weight Class: Select a weight unit such as
gramorkilogramfrom the values defined in the Units module. - Width: The width of the Article.
- Height: The height of the Article.
- Length Class: Select a length unit such as
centimeterormeterfrom the values defined in the Units module. - Flexible: Determines whether the Article is flexible. This is mainly useful for containers, so storage capacity can be calculated more accurately.
- Points: Default is
0. This value can be used for employee point calculations and, in some workflows, payroll calculations. - Note: A free-text note for internal use.
- Image: Upload an icon or image for the Article. For better visual consistency, using flat icons is recommended.
- Background: A default background image used for Image Marker features and for operational staff in the Process page.
For better visual consistency, it is recommended to use flat icons for Articles and Categories. Ex: FlatIcon.com
For better visual consistency, you can search Google for black-and-white pattern images using phrases like ArticleName flat sketch pattern.
For example: Suit flat sketch pattern
Attachments
Some Articles represent multi-part Items, such as a suit, a blouse and pants set, or similar combinations. In these cases, you can link Articles together in the Attachments section.
Attachment Fields
- Attachments Only:
Yes/No. When enabled, this Article is not treated as a standalone item and is mainly used as a link container for attached Articles. - Linked Articles: A multi-select field that allows you to choose several existing Articles and connect them together.
In many cases, Attachments Only is set to Yes for grouped or combined Articles.
Article Options
The Options field in the Article form works the same way as in the Category form, but it applies only to the selected Article.
Use it when a specific Article should show a special set of Option Groups during order creation on the Drop page, even if those Option Groups are not assigned to the whole category.
For example, a special Article may need a dedicated hidden Option Group that should not appear for other Articles in the same category.
Sorting and Organization
Both Categories and Articles support drag & drop.
You can use drag & drop to
- Reorder Categories
- Move one Category under another
- Reorder Articles inside a Category
- Move Articles from one Category to another
This makes it easier to keep the Article structure clean and aligned with your operational workflow.
Related Pages
Practical Notes
- Keep Category images visually consistent for a cleaner interface.
- Keep Article icons simple and easy to recognize.
- Use Category-level Options for shared behavior.
- Use Article-level Options only when a specific Article needs different behavior.
- Use drag & drop for quick reorganization instead of reopening forms.
Summary
The Article Management page is used to manage the structure behind your Items in Caramel.
From this page, you can:
- Create and edit Article Categories
- Create and edit Articles
- Link Articles together as attachments
- Assign Option Groups to Categories or individual Articles
- Reorder everything with drag & drop